Learning from the Cinematic Masters
Why It Matters
Drone technology changes every year. The principles behind great cinematography haven’t changed in a century. Hollywood directors have been perfecting camera movement, storytelling, and visual language since before anyone imagined a flying camera. The same concepts that guided filmmakers in 1997 apply directly to your drone today, because human perception hasn’t changed.
This lesson gives you a framework for analyzing and creating cinematic shots that goes beyond memorizing a list of moves. Internalize these five principles, and you’ll walk onto any location knowing what to shoot and how to shoot it.
The Five-Step Framework
Every great drone shot (and every great shot in cinema history) can be analyzed through five elements. Think of them as a checklist you run through before, during, and after each shot.
1. Create Suspense
Don’t lay all your cards on the table in the first frame. The most powerful shots hold something back.
What this means for drones: Instead of starting with the full landscape visible, begin with the camera focused on something ordinary: a wall, a tree line, a rooftop. Then, through movement or subject action, reveal what’s beyond. The viewer’s brain registers that there’s something they can’t see yet, and they stay engaged.
A subject walking into the frame creates more interest than a subject already standing there. A camera moving toward something unseen creates more tension than showing everything at once. This principle of withholding information to create curiosity is as old as cinema itself.
Practical application: Start your push-in aimed at a foreground object like trees or a building corner. The viewer wonders what’s behind it. As the drone clears the obstacle, the landscape appears. That moment of revelation is suspense paying off.
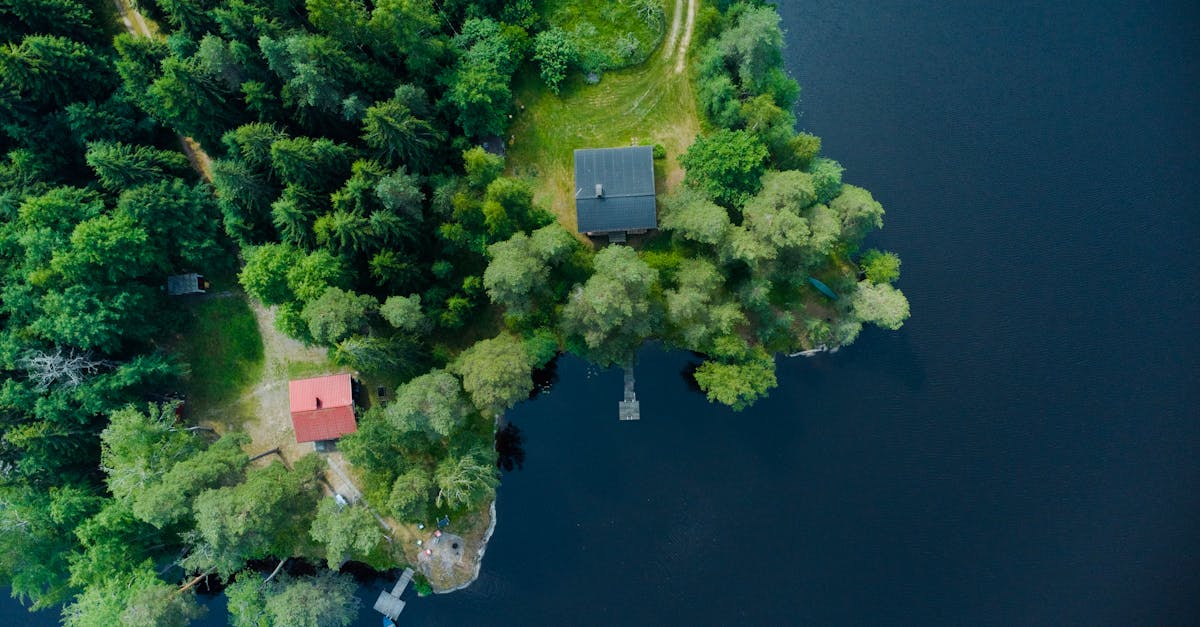
2. Create Depth
A two-dimensional screen showing a three-dimensional world. Your job is to make the viewer feel that depth.
Layers create dimension. Think of your shot as having three planes:
- Foreground — closest to the camera (trees, rocks, buildings at the edges)
- Middle ground — your subject or the main area of interest
- Background — the distant landscape, mountains, sky
When all three layers are visible, the image feels three-dimensional. When only one layer exists (a flat expanse shot from directly above), the image feels thin no matter how beautiful the colors.
The easiest way to add depth is to include something between the camera and the subject. Trees passing the frame edge during a lateral pass. A rooftop sliding past during a push-in. Rocks in the foreground during a coastal flyby. These elements create parallax, where different layers move at different speeds, and that’s how the brain perceives depth.
Layers also create suspense. Hide your subject behind a foreground layer, then move the drone to reveal it. You’ve combined principles 1 and 2: depth serving suspense.
3. Add Motion with Purpose
Drone movement isn’t decoration. It’s storytelling. Every movement should serve the narrative of the shot.
Motion reveals subjects. A rising crane shot reveals what’s beyond a ridge. A lateral pass reveals a subject hidden behind trees.
Motion creates energy. Fast forward movement builds urgency. Slow backward movement suggests departure or melancholy. An orbit gives a sense of admiration or examination.
Motion guides attention. The viewer’s eye follows the direction of movement. If the camera moves left, the viewer looks left. Use this to direct attention toward your subject or away from distractions.
Here’s the key insight from film analysis: most Hollywood drone shots use simple movement. Forward, backward, up, down, or sideways. Not complex multi-axis combinations. The beauty comes from combining simple movement with the other four principles, not from complicated stick work.
DJI’s automated flight modes (Active Track, QuickShots, Waypoints) can create smooth motion with minimal effort. But they can also lose tracking, fly unpredictably, or create movements that feel mechanical rather than intentional. Use them as tools, not crutches. The best shots come from manual control, where you decide the speed, the arc, and the timing.
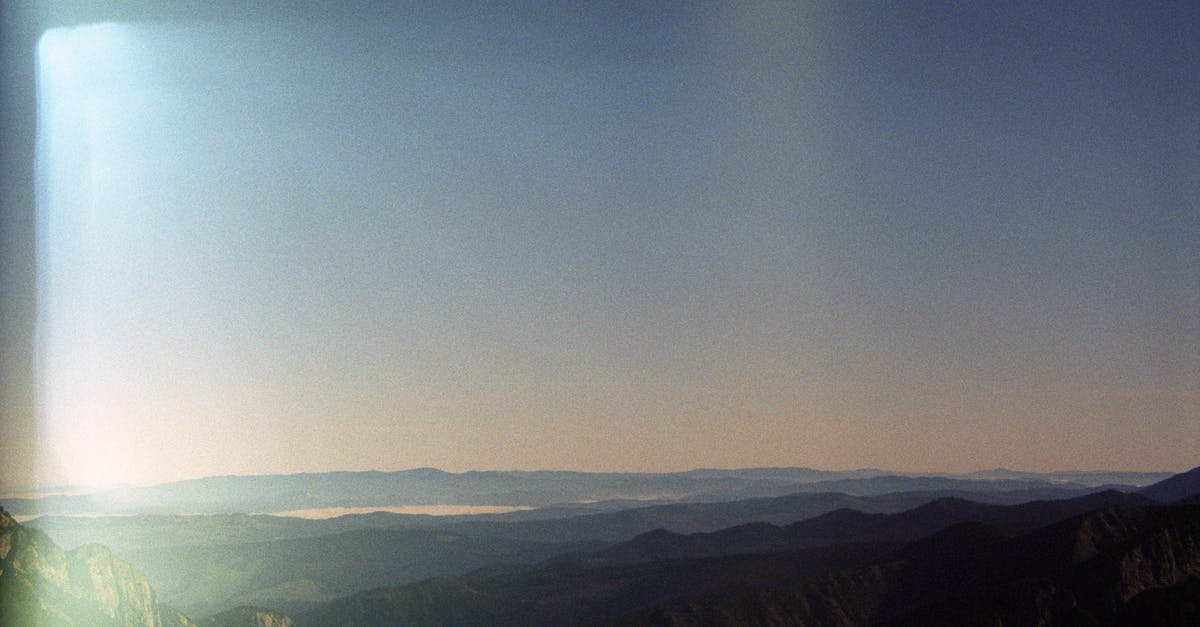
4. Use Light Deliberately
Light is the one element you can’t fully control, but you can plan around it.
Time of day matters enormously. Golden hour (the hour after sunrise and before sunset) produces warm, directional light with long shadows. That’s the most cinematic natural light available. Midday sun creates flat, harsh lighting from directly above. Blue hour (twilight) produces cool, moody tones.
Shadow direction tells the viewer where the sun is. Shadows stretching toward the camera create a different mood than shadows falling away. Side lighting (sun at 90 degrees to your shooting direction) creates the most dramatic shadows and depth. Front lighting (sun behind you, illuminating the subject) produces the most even, colorful footage.
Position yourself relative to the light. Before choosing your flight path, find the sun. Then decide what you’re after. Front-lit footage makes colors pop with even exposure. Side-lit footage gives dramatic shadows and maximum depth. Back-lit footage creates silhouettes, lens flare, and moody atmosphere.
5. Compose with Intention
Composition in drone videography is trickier than in still photography because the frame changes during movement. But the fundamental principles still apply.
The rule of thirds adapts to movement. Place your subject at a thirds intersection at the START of the shot, knowing it may drift to center by the end. That compositional evolution from off-center to centered tells a micro-story of focus narrowing.
Center framing creates power. A subject dead-center during an orbit or push-in creates a tunnel effect. The viewer’s attention cannot escape. Use center framing when the subject itself is the entire point.
Looking space and moving space. When a subject is moving or looking in a direction, leave more empty frame on that side. A person walking right should have more space to the right. A vehicle driving forward should have road ahead of it in the frame.
Traditional photography composition rules were designed for cameras on the ground, with portrait and landscape orientations and the photographer choosing a single frame. Drone cameras shoot from above, at angles, and while moving. The rules bend but don’t break. You’re still guiding the viewer’s eye and creating visual balance, just in three dimensions instead of two.
Putting It All Together: The 50-Point Shot
Imagine scoring each shot out of 10 on each of the five principles:
| Principle | What to Score | Perfect 10 |
|---|
| Suspense | Does the shot withhold something and then reveal it? | Subject appears mid-shot through movement | | Depth | Are there foreground, middle, and background layers? | Three distinct planes visible with parallax | | Motion | Does the movement serve the story? | Smooth, intentional movement that reveals or emphasizes | | Light | Is the light adding mood, not fighting it? | Golden hour or dramatic side lighting | | Composition | Is the framing intentional at start, middle, and end? | Subject placed deliberately throughout the entire movement |
A shot that scores high on all five isn’t luck. It’s the result of walking onto a location and thinking through each principle before takeoff.
Quick Check
Q: What’s the first principle and why does it matter? A: Create suspense. Withhold information from the viewer to generate curiosity. Shots that reveal something mid-movement hold attention far better than shots showing everything from the start.
Q: How do you create depth in a flat landscape? A: Include foreground elements between the camera and the subject. Even a single tree at the edge of the frame creates a foreground layer that makes the image feel three-dimensional.
Q: Why do most Hollywood drone shots use simple movement? A: Because simple movement (forward, backward, up, down, sideways) combined with strong suspense, depth, light, and composition creates better results than complex multi-axis movements with weak storytelling.
What’s Next?
The cinematic mindset is set. Let’s start building your shot vocabulary with the foundational movements.
Pilot Institute — thinking like a filmmaker, not a pilot.