How to Fly a Drone for Beginners: Complete Step-by-Step Guide
Just unboxed your first drone? Here's everything you need to know — from understanding the controller to your first takeoff, flight exercises, and safe landing.
To fly a drone as a beginner, learn Mode 2 controls: left stick handles throttle (up/down) and yaw (rotation), right stick handles pitch (forward/backward) and roll (sideways). Start in Beginner Mode with GPS stabilization, keep the drone facing away from you, and practice hovering, straight lines, and box patterns at low altitude before attempting turns.
So, you just bought your first drone. You unboxed it, charged it, and now you’re staring at the controller with a mix of excitement and mild panic. That’s completely normal. Flying a drone feels unnatural at first because you’re controlling movement in three dimensions instead of two.
But here’s the good news: you don’t need to be a pilot to get started. You just need patience and a structured approach.
If you’re starting from zero, picking a beginner-friendly drone makes a massive difference. Something like the DJI Mini 4 Pro is a solid choice because it’s lightweight, stable, and has built-in safety features that forgive the typical mistakes new pilots make. Regardless of what drone is sitting on your table, the fundamentals of flying are exactly the same.
This guide walks you through everything — from understanding the controller to your first takeoff to avoiding those heart-stopping crash moments.
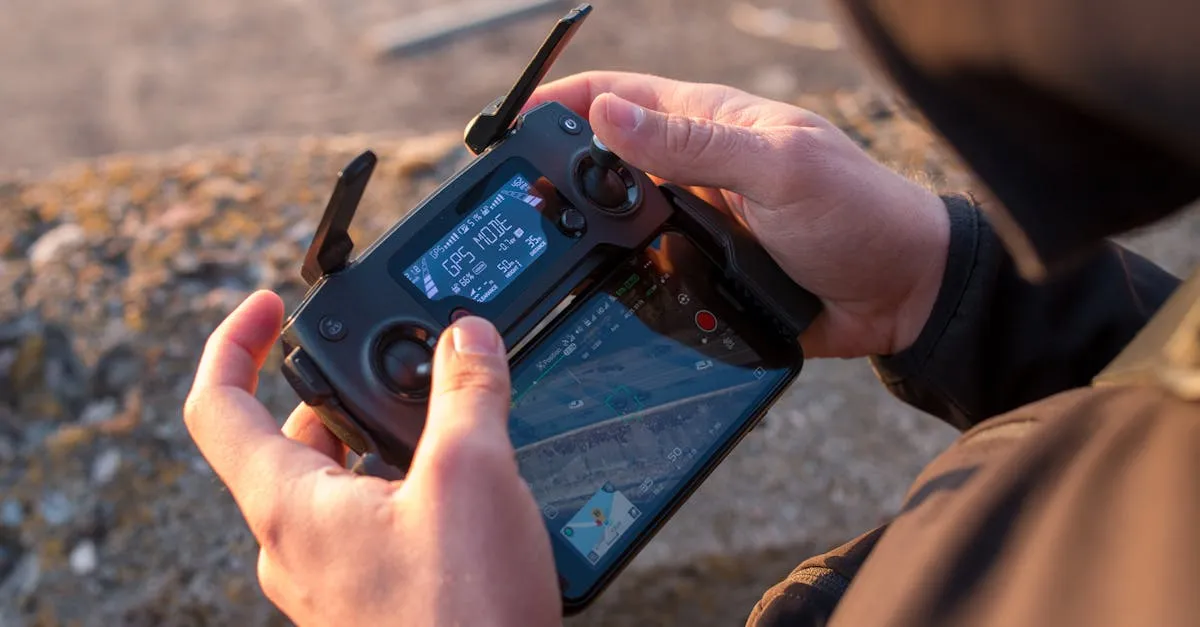
Step 1: Understand Your Controller (Mode 2)
Before your drone leaves the ground, you need to understand the language you’re speaking to it. That language is the controller layout. In the drone world, “Mode 2” is the standard. If you bought a consumer drone from a major brand, it’s almost certainly set up this way out of the box.
Mode 2 splits the controls logically between your two hands:
The Left Stick (Throttle and Yaw)
- Throttle (Up and Down): Push the left stick up to increase motor power and climb. Pull it down to descend.
- Yaw (Left and Right): Push the left stick left or right to rotate the drone on its own axis. It spins in place. It doesn’t move sideways — think of yaw like a person standing in one spot turning their shoulders to look left or right.
The Right Stick (Pitch and Roll)
- Pitch (Forward and Backward): Push the right stick forward to tilt the nose down and fly forward. Pull it back to fly backward.
- Roll (Left and Right): Push the right stick left or right to tilt the drone sideways and fly in that direction.
Memorize this split: Left stick handles altitude and rotation. Right stick handles the actual direction of travel.
Step 2: Thumb vs. Pinch Grip
How you hold the controller matters more than you might think. There are two main methods:
Thumb Grip — Rest your wrists on the bottom of the controller and use only your thumbs on the sticks. Comfortable and natural if you’ve played console games. Slightly less fine motor control since your thumb pivots from a single joint.
Pinch Grip — Place your index finger on top of the stick and your thumb on the bottom, pinching the stick between them. Your wrists usually float or rest on a strap. This gives you much higher precision because you’re using your whole hand and arm for adjustments.
Both methods are completely valid. Start with whatever feels comfortable. As you progress to more precise maneuvers, you might naturally migrate to the pinch grip.
Step 3: The Pre-Flight Checklist
Skipping pre-flight steps is how drones end up in trees. Build the habit of running through this checklist before every flight:
Pre-Flight Checklist
- Charge everything: Drone battery and controller battery fully charged
- Update firmware: Connect to the app and update drone, controller, and battery if prompted
- Calibrate the compass: If the app prompts you, or if you’re flying at a new location for the first time
- Inspect the props: Look for cracks, chips, or loose screws
- Find an open area: Wide-open field with short grass. Zero trees, zero power lines, zero buildings
- Check the weather: Don’t fly in high winds (over 15-20 mph) or rain
- Set RTH altitude: Higher than the tallest obstacle in your flying area
Step 4: Simulator Practice (Highly Recommended)
You might be eager to get outside, but if you want to save yourself money and frustration, practice on a simulator first. Flying a drone requires muscle memory that you can’t get from reading about it.
A simulator lets you crash as many times as you need to without breaking anything. You can practice orientation, emergency stops, and landing in a safe environment. Something like the Liftoff FPV Simulator is a fantastic way to build stick skills. Even if you plan to fly standard camera drones and not FPV racing drones, the stick inputs and physics build a solid foundation.
Step 5: Setting Up for Your First Real Flight
When you head out to that open field for the first time, configure three things before you take off.
Turn on Beginner Mode. If you’re flying a DJI drone, this feature restricts your speed and limits how far the drone can fly (usually a 30-meter radius). It also prevents you from flying too high. You can’t outfly the safety net.
Fly in GPS or Stabilized mode. Your drone uses GPS satellites to hold its position. If you let go of the sticks, the drone brakes and hovers in place. Never switch to Manual or Acro mode as a beginner — those modes turn off GPS stabilization, meaning if you let go, the drone keeps flying until it hits something.
Set Return to Home (RTH) altitude. RTH automatically flies the drone back to you if the battery gets low or the signal drops. Before every flight, find the tallest obstacle in your area and set RTH altitude at least 20 feet higher than it.
Step 6: Taking Off
Find a flat patch of grass. Place the drone on the ground facing away from you. That last part is critical: always fly with the drone facing away from you during your first flights. When the drone’s nose points away from your body, the controls match what you expect. Push right stick forward, drone goes forward. Push right, drone goes right.
To start the motors, push both sticks down and inward toward each other (this is called the CSC command). The motors will spin up.
Gently push the left stick up. Just a tiny bit. The drone lifts off. Bring it up to about 10 feet, then let go of the left stick. In GPS mode, the drone should hang there, hovering.
Take a deep breath. You’re flying.
Step 7: Your First Flight Exercises
Now that you’re hovering at 10 feet, we’re going to do two exercises using only the right stick. Leave the left stick alone.
The Hardest Skill: Hovering
Hovering is actually the hardest basic skill. Drones are affected by tiny gusts you might not even feel on the ground. The drone will drift. Your job is to make micro-corrections. Don’t slam the sticks all the way over. If the drone drifts two feet right, push the right stick left just a fraction of an inch. Small, gentle inputs are the secret. Big stick movements lead to overcorrections, which lead to crashes.
Exercise 1: Straight Line Forward and Back
Keep the drone facing away from you. Push the right stick forward gently. The drone moves away. Let it go about 20 feet, then pull the right stick straight back. The drone stops and returns to you. Do this five times. Focus on smooth movements and stopping without bouncing.
Exercise 2: The Box Pattern
Push the right stick forward to fly away. Stop. Push right to fly sideways. Stop. Pull back to fly toward yourself. Stop. Push left to fly sideways back to start. Stop. You’ve drawn a square in the sky. Repeat until it feels smooth.
Notice we’re not using yaw (left stick) at all. Turning the drone while you’re learning pitch and roll is a recipe for confusion. Keep the nose pointing away.
Step 8: Landing Safely
When your battery hits around 25%, it’s time to land. Don’t push the battery to zero. Low battery causes panic, and panic causes crashes.
Bring the drone over your flat landing spot. Let it hover at about 10 feet. Slowly, gently pull the left stick straight down. The drone descends. Keep pulling down at a slow, steady pace. Don’t yank the stick.
As the drone gets close to the ground, ground effect (air bouncing off the ground back into the props) might make it feel slightly unstable. Just maintain steady downward pressure until the drone touches the grass.
Once it’s on the ground, keep holding the left stick down for a few seconds. The motors spin down and stop. Wait for the app to confirm motors are off before walking over.
How to Avoid Crashing Your Drone
Most beginner crashes happen for the same four reasons. Avoid these and you’ll likely keep your drone in one piece.
1. Flying Sideways or Backwards Without Looking
When you fly sideways or backward, the drone is moving in a direction you can’t see. It’s incredibly easy to not spot a tree, pole, or person. Always turn the drone (using the left stick) to face the direction you want to go before moving, or physically walk around to maintain line of sight.
2. Losing Orientation
This happens when you turn the drone so it’s facing you. If the drone faces you, the controls are reversed. Push the right stick right and the drone goes to its right, which is your left. If you get confused, let go of the right stick. The drone stops. Then use the left stick to slowly yaw the drone until it’s facing away from you again.
3. Flying Too Far
It’s easy to get confident and let the drone fly to the edge of your sight. When a drone gets far away, you lose depth perception. You also might not realize it’s flying behind a tree line. Stick close until you’re experienced.
4. Low Battery Panic
When the battery gets critically low, the drone automatically triggers Return to Home. If you haven’t set your RTH altitude high enough, the drone might try to fly straight back and hit a tree. Set the RTH altitude, and when the battery warning sounds, just let the drone come home.
Tracking Your Progress
You’ll improve fast, but you won’t feel it day to day. Keep a flight log — a notebook or a phone note works fine.
After every session, jot down:
- Date and location
- Flight mode (GPS / Beginner Mode)
- Flight time (total minutes across batteries)
- Skill practiced (box patterns, hovering in wind, etc.)
- Notes (“Felt smooth going forward, sideways movements were jerky — need smaller stick inputs”)
Looking back at your log a month from now will show you that the patterns that felt impossible on day one are now second nature.
You’re Ready for Takeoff
Learning to fly a drone is a process of building muscle memory. Your brain has to wire itself to understand three-dimensional movement, and that takes time. Don’t get frustrated if your first few flights look shaky. Every professional drone pilot started exactly where you are right now.
Take it slow. Respect the battery limits. Keep the drone facing away from you until you’re comfortable. Follow these steps and you’ll transition from nervous beginner to confident pilot faster than you think.
Frequently Asked Questions
What is Mode 2 on a drone controller? The standard layout where left stick controls throttle (up/down) and yaw (rotation), while right stick controls pitch (forward/backward) and roll (sideways). Most consumer drones use Mode 2 by default.
How high should I set Return to Home altitude? At least 20 feet higher than the tallest obstacle in your flying area. This ensures the drone clears trees, buildings, and power lines when RTH triggers automatically on low battery or signal loss.
How do I start the drone motors? Push both sticks down and inward toward each other simultaneously (the CSC command). This safety mechanism prevents accidental motor startup.
At what battery percentage should I land? Around 25%. Waiting until critically low causes panic and crashes. The drone will automatically trigger Return to Home when power gets too low.
What wind speed is too high for beginner drone flying? Avoid flying in winds over 15-20 mph. High winds make hovering difficult, increase drift, and can push your drone into obstacles.
Why do controls feel reversed when the drone faces me? Pitch and roll are relative to the drone’s nose, not your perspective. Pushing right stick right moves the drone to its right, which is your left. Let go of the sticks to stop, then yaw the drone away from you using the left stick.
If you want a structured, video-guided path to walk you through all of this and dive deeper into airspace rules, weather reading, and advanced camera movements — check out our free Getting Started with Drones course. It covers everything from your first unboxing to your first real aerial shots.