First Drone Flight: How to Take Off, Hover, and Land Safely
Every drone pilot remembers their first flight. Here's exactly what to do — step by step — so yours goes smoothly.
For your first drone flight, find an open field with no obstacles, verify airspace is clear using the B4UFLY app, and wait for a solid GPS lock. Position the drone 10-15 feet ahead with its nose facing away from you, start the motors with the CSC command (both sticks down and inward), gently push the left stick up to climb to 10 feet, and practice hovering before attempting any movement.
You’ve unboxed your new drone. You’ve charged it, read through the manual (or at least glanced at it), and now you’re standing in your yard with the controller in your hands. If your heart is beating a little faster than usual, take a deep breath. That feeling is completely normal.
Every single drone pilot — from weekend hobbyists to Hollywood cinematographers — felt exactly the same way during their first flight. It’s exciting, but it’s also a little nerve-wracking to send a piece of expensive technology into the sky.
The good news is that modern drones are incredibly smart. If you’re flying something like the DJI Mini 4 Pro, the drone practically wants to fly itself. It has GPS, obstacle sensors, and a stabilizing gimbal that makes capturing smooth footage effortless. But to unlock that potential, you need to master the basics first.
Today, we’re going to walk through your very first flight. No fancy cinematic shots. No sweeping panoramas. Just the core fundamentals of taking off, hovering, and landing safely.
1. Find the Right Location
Before you even think about turning on the controller, find the right spot. A bad location can turn a fun flight into a stressful disaster.
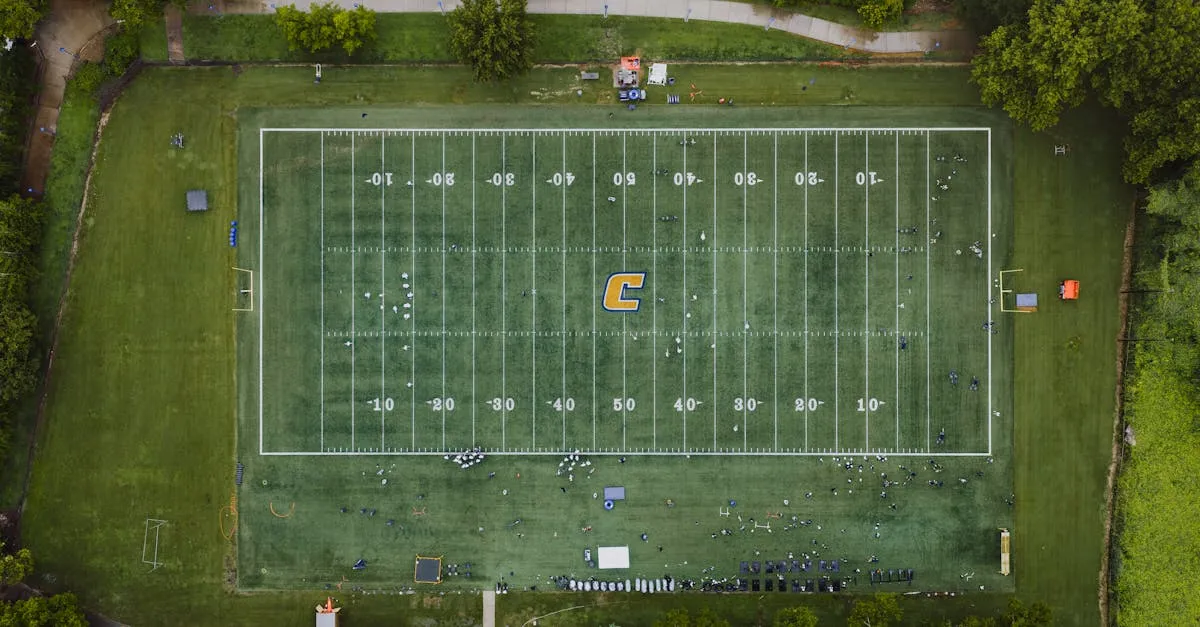
For your first time, you want a wide-open field with no obstacles. No trees, no power lines, no buildings, and absolutely no people or animals nearby. A local park on a quiet weekday morning or an empty soccer field is perfect.
Most importantly, check the airspace. You can’t just fly wherever you want. Download the B4UFLY app (available for iOS and Android) before you head out. It’ll show you exactly where you’re allowed to fly and if there are any temporary flight restrictions. If the app says you’re clear, you’re good to start setting up.
2. Pre-Flight Setup
Rushing through your pre-flight setup is the fastest way to ruin a day of flying. Treat this like a pilot’s checklist:
- Make sure your drone battery and controller are fully charged
- Unfold the drone and securely attach the propellers — you should hear a satisfying click
- Insert your MicroSD card — there’s nothing worse than landing after a perfect flight only to realize you have no footage
- Turn on the controller and the drone
- Calibrate the compass if the app prompts you (usually involves holding the drone level and turning in a circle)
- Wait for a solid GPS lock — do not skip this. You’ll know you have a lock when the app says your Home Point is recorded and the drone’s status light turns solid green
3. Set Your RTH Altitude
Before taking off, open your drone app settings and find the Return to Home (RTH) feature. This is your ultimate safety net. If your battery gets too low or you lose connection, the drone automatically flies back to where it took off.
But it needs to know how high to fly to clear obstacles on the way back. Look around your flying area, find the tallest object, and set your RTH altitude at least 20 to 30 feet above it. Always better too high than too low.
4. Position Your Drone
Where you place the drone on the ground matters more than you think. Place it 10 to 15 feet in front of you on a flat, dry surface. More importantly, make sure the nose (the front) is facing away from you.
This is a crucial rule for beginners: nose away means your controls match your expectations. Push the right stick forward, the drone flies away from you. Push it right, the drone goes right. If the drone is facing you, the controls become reversed — a incredibly common way for beginners to crash.
Keep the nose pointing away.
5. Start the Motors
To start the motors, use the CSC (Combination Stick Command): push both sticks down and inward toward the bottom center of the controller. You’ll hear the motors spin up and beep. Step back a few feet — the downdraft from the propellers can kick up dust and debris.
6. Take Off
Now for the moment of truth. Gently push the left stick up. Don’t slam it — a slow, smooth, gentle push. The drone lifts off. Once it’s about three feet in the air, let go. It will stop climbing and sit there.
Now push the left stick up again to climb to about 10 feet. Let go of the left stick entirely.
Watch what happens. The drone just hovers there in place. That’s the magic of GPS mode.
Take a second to breathe. You’re flying.
7. Exercise 1: Just Hover
For your first exercise, don’t try to fly anywhere. Just let the drone sit at 10 feet and hover for two to three minutes. This seems boring, but it’s the most valuable thing you can do right now.
During this time, pay attention to how the drone responds. It might drift a few inches forward, backward, or sideways from slight wind. Watch how the drone automatically corrects itself. Feel free to make tiny micro-corrections using the right stick to keep it exactly where you want it. This exercise teaches you how sensitive the sticks are and builds muscle memory without any risk.
8. Exercise 2: Forward and Back
Once you’re comfortable hovering, it’s time to move. Using only the right stick, gently push it forward to fly the drone about 20 feet away from you. Then pull the right stick back to fly it back to its original spot.
Do this five times. Focus on smooth, gentle movements. Don’t yank the stick — ease into the input and ease out. A drone in the air has momentum. It won’t stop the exact millisecond you let go; it glides to a halt. Learning to anticipate this glide is key.
9. Exercise 3: Fly a Box Pattern
Now let’s combine directions. Still using only the right stick, fly a small box pattern:
- Push forward — fly away 20 feet. Stop.
- Push right — fly sideways 20 feet. Stop.
- Pull back — fly toward yourself 20 feet. Stop.
- Push left — close the box and return to start. Stop.
Take your time. If you get disoriented, just let go of the right stick. The drone stops and hovers, giving you a chance to figure things out. Repeat until it feels fluid.
10. Land Safely
Landing requires patience. Using the right stick, fly the drone back until it’s directly over your takeoff spot, hovering at about 10 feet.
Grab the left stick and slowly pull it straight down. The drone descends. Keep pulling down slowly and steadily. Don’t rush.
When the drone is about a foot off the ground, it may display a “Landing” confirmation on your screen. Keep holding the left stick down until the drone touches the ground and the motors completely stop spinning.
Once the motors are off, you can safely walk over and pick it up.
Common First-Flight Mistakes
As you practice, watch out for these three beginner traps:
Overcorrecting — The number one reason beginners crash. The drone drifts slightly left, so they panic and slam the stick hard right. Now the drone is flying wildly right, so they slam it hard left. This creates a chaotic flight path. Remember: tiny inputs. If the drone drifts a little, use a tiny bit of stick. Less is more.
Panicking and freezing — If you get confused, your instinct might be to keep holding the sticks. Don’t. If you feel panicked, take your thumbs off the sticks. In GPS mode, letting go is your emergency pause button. The drone immediately stops moving and hovers, giving you time to think.
Forgetting to check wind — What feels calm on the ground can feel like a hurricane at 100 feet. Always check wind speed before flying. As a beginner, don’t fly if wind is above 10-15 mph. Let the drone hover at 10 feet first to see how much it’s buffeted before climbing higher.
You’re Ready
Your first flight is just the beginning. By taking the time to master these basic steps — finding a safe location, prepping your gear, hovering, and landing smoothly — you’re building a foundation that will eventually lead to amazing aerial photography and confident flying.
Frequently Asked Questions
How long should my first flight last? 5-7 minutes, even if your battery has more. You’re learning muscle memory and processing a lot of new information, so fatigue sets in fast. Landing with plenty of battery eliminates the stress of a low-battery warning during an unfamiliar experience.
What if I can’t get a GPS lock before takeoff? Never take off without a solid GPS lock. Flying without it means no automatic hovering, no Return to Home, and significantly less stability. Move away from large metal objects, buildings, or power lines, and wait 30-60 seconds for enough satellite connections.
Why should the drone face away from me? When the nose points away, controls match your expectations. Push right stick forward and the drone flies away from you. If the drone faces you, controls are reversed, which is a common cause of beginner crashes.
What does a solid green light mean? The drone has acquired a solid GPS lock and recorded your Home Point. Never take off until you see this indicator.
What wind speed is too high for a first flight? Avoid flying above 10-15 mph as a beginner. What feels calm on the ground can feel significantly stronger at altitude. Hover at 10 feet first to test conditions before climbing.
What if I panic while flying? Take your thumbs off the sticks. In GPS mode, letting go acts as an emergency pause. The drone immediately stops and hovers in place, giving you time to recover.
If you want to dive deeper into camera settings, airspace regulations, and advanced flight maneuvers, check out our free Getting Started with Drones course. Happy flying!