Drone Panorama Photography: How to Shoot and Stitch
A great panorama captures a scene the way your eyes experience it. And with a drone, you can shoot from anywhere in 3D space.

A great panorama captures a scene the way your eyes actually experience it — not as a cropped rectangle, but as an expansive view. With a drone, you can position your camera anywhere in 3D space for perspectives that ground-based photographers can only dream about.
Why Drone Panoramas Are Unique
Ground panoramas always work from eye level. A drone lets you hover at exactly the right altitude to separate foreground from background, position yourself over water, alongside cliffs, or between trees. The camera can be anywhere, and that freedom opens compositional possibilities unavailable on the ground.
From above or at a controlled angle, you also minimize converging vertical lines that plague ground-based panos.
Types of Drone Panoramas
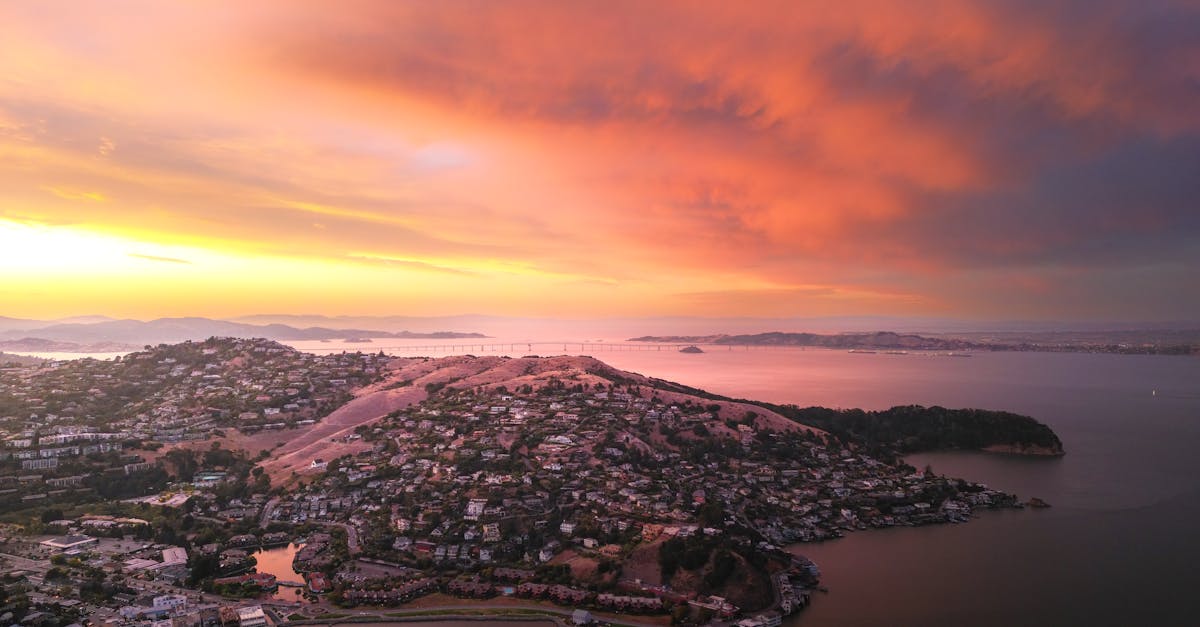
Horizontal panoramas — Sweep left to right for wide vistas. Perfect for sunsets over mountain ranges, city skylines, any scene wider than it is tall.
Spherical panoramas — 360 degrees in all directions. Immersive images viewers can look around in. DJI drones have built-in spherical pano mode that handles shooting automatically.
Vertical panoramas — Stack shots top to bottom for tall subjects: waterfalls, skyscrapers, cliffs. Emphasize height in a way a single frame can’t.
How to Shoot
Easiest: Use your drone’s built-in pano mode. DJI drones handle camera movement, overlap, and exposure automatically. Reliable and produces good results.
For maximum quality: Shoot manually with this workflow:
-
Lock exposure. Switch to AEV lock so every frame has identical settings. Point at the brightest part of the scene, lock, don’t touch until done. Without this, brightness varies across frames.
-
Overlap at least 30%. This gives stitching software enough shared information for perfect alignment. 50% overlap is ideal; 30% is the minimum.
-
Keep the drone perfectly still. The entire pano shoots from a single point. Don’t move the drone between frames — only rotate the camera. Even slight drift creates parallax errors that cause visible misalignment.
-
Shoot in RAW. Maximum flexibility in post-processing and the cleanest stitching results. JPEGs work but discard data that might matter for alignment.
Stitching Software
Lightroom — Built-in panorama merge (Photo Merge > Panorama). Handles most standard panos well and keeps everything in your Lightroom workflow. Limited control over the stitching process.
Photoshop Photomerge — More powerful than Lightroom with multiple projection modes (spherical, cylindrical, perspective). Good for tricky panos where Lightroom struggles.
PTGui — Professional panorama stitching tool with incredible control over every aspect. Handles complex alignment challenges that would make Lightroom and Photoshop give up. Has a learning curve, but the results are worth it.
Tips for Better Panoramas
Shoot during golden hour. Soft, warm light of sunrise and sunset makes landscapes look better. Directional light creates shadows and depth that make panos more interesting.
Use a high vantage point, but not too high. One common mistake is flying too high. You want elevation but also a connection with the landscape. 100-200 feet often works better than 400 feet for creating a sense of place rather than a map-like view.
Look for leading lines. Roads, rivers, fences, ridgelines sweeping through your pano create visual flow and make the image dynamic.
Avoid moving subjects. Cars, people, and animals appear in different positions across frames, creating “ghosting” — semi-transparent duplicates. Wait for movement to clear or plan to clone them out.
Our free Drone Photography Course covers panoramas, composition, HDR, and complete post-processing workflows.