Drone Controller Explained: What Every Button Does (DJI Guide)
Staring at your DJI controller wondering what everything does? Here's a complete walkthrough of every stick, button, and dial.
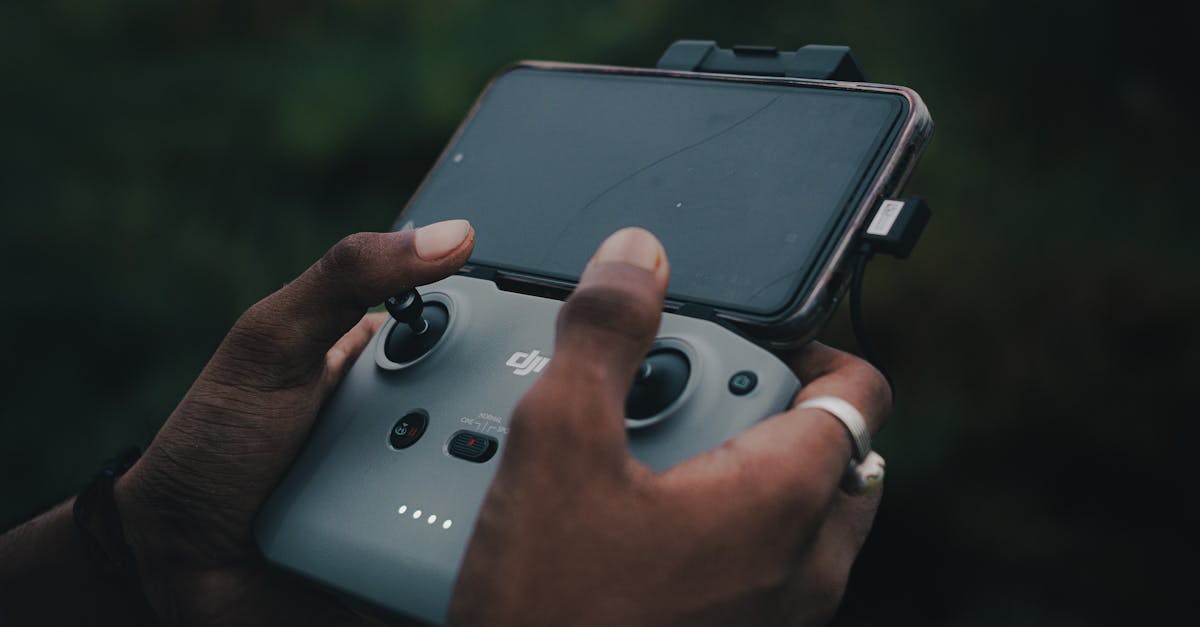
So you just got your first DJI drone. You’ve unboxed it, charged the batteries, and now you’re staring at this controller with more buttons than your TV remote. Don’t panic. Every button, dial, and switch has a purpose — and once you understand them, you’ll feel confident before you ever leave the ground.
The Sticks: Your Main Flight Controls
Most DJI drones ship in Mode 2, the standard layout in North America.
Left stick: Push up to climb, pull down to descend. Push left to yaw left (rotate counterclockwise), push right to yaw right (rotate clockwise). This stick controls altitude and which direction the drone faces.
Right stick: Push forward to fly forward, pull back to fly backward, push left to fly left, push right to fly right. This stick controls where the drone actually moves.
Key insight for beginners: the right stick moves the drone relative to where the nose is pointing, not relative to you. If the drone faces away, pushing right makes it fly right. If it’s facing you, that same push makes it fly to your left. This is why practicing hovering with sticks centered matters — it builds orientation muscle memory.
The Power Button
On most DJI controllers, you don’t just press once. You press once, then press and hold. The controller beeps, LEDs flash, then go solid. Same for turning off. Mash it impatiently and nothing happens.
Return to Home (RTH) Button
Your panic button in the best way. Press RTH once and the drone climbs to your preset RTH altitude, flies back to the takeoff point in a straight line, then descends and lands.
Pressed RTH by accident? Press and hold to cancel. The drone stops returning and hovers in place.
Important: RTH only works well if your home point is set correctly (happens automatically on takeoff) and you have enough battery. Don’t treat it as a substitute for monitoring battery level.
The Pause Button
A lifesaver during intelligent flight modes like ActiveTrack or Waypoints. Press once and the drone immediately stops whatever it’s doing and hovers. Even in manual flight, it acts as a quick “freeze” if you get disoriented — hit pause, look at the screen, figure out orientation, resume.
Camera Shutter and Video Record
Positioned on the top right so your right index finger can reach them without taking your thumb off the right stick. One takes photos, the other starts/stops video recording. Look for the red indicator on screen when recording.
The Gimbal Dial
That scroll wheel on the front left controls camera tilt. Scroll up to point the camera up, scroll down to point it down. You can adjust speed and smoothness in settings.
Common mistake: forgetting to center the gimbal before landing. If you land with the camera pointed straight down, you’ll be staring at grass on next takeoff.
C1 and C2 Customizable Buttons
Your wildcard buttons. By default they might not do much, but in settings you can assign:
- Toggle between camera and map view
- Center the gimbal
- Toggle grid lines
- Switch photo/video mode
- Reset exposure settings
Figure out which actions you use constantly and assign those to C1/C2 so you don’t tap through menus mid-flight.
What You See on Screen
Telemetry: Altitude, distance from controller, speed, and battery percentage in the corners. Glance regularly — don’t stare at numbers while flying.
Map view: Shows drone position, controller position, and home point. Invaluable when you can’t see the drone visually.
Histogram: That graph in the corner shows exposure. Bunched left = underexposed. Bunched right = overexposed. Centered is generally good.
Exposure settings: ISO, shutter speed, aperture (if adjustable). Learn these if you care about image quality.
Antenna Position Matters
For best signal, point antennas parallel to the drone, not directly at it. The signal comes off the sides of the antennas, not the tips. Drone flying high? Angle antennas up. Drone far away at same altitude? Keep them horizontal.
Controller Charging
Most modern DJI controllers use USB-C. The RC-N1 has an internal battery — plug in and charge. Controllers with built-in screens (RC Pro, Smart Controller) often use removable packs for quick swaps.
Don’t let the battery sit at 0% for extended periods. LiPo batteries degrade when fully depleted. Store around 50% if you won’t fly for a while.

Beginner Tips
Practice hovering with sticks centered. Take off, hover at eye level, don’t touch the sticks. Do this until it feels boring.
Keep thumbs on sticks at all times during flight. Use index fingers for shutter and record. Taking thumbs off means you’re not ready to react.
Stay close and low at first. Learn what the controls feel like. The drone will be there tomorrow.
Our free Getting Started with Drones Course walks you through every control from unboxing to your first flight.