How to Shoot Real Estate Drone Videos: Complete Workflow
The repeatable system for shooting real estate drone videos that agents love — from essential shots and camera settings to pricing your work.
Popping a drone up and grabbing a quick clip of a house is easy. But shooting a real estate drone video that actually helps sell a property and makes you look like a pro? That requires a repeatable workflow.
Agents don’t just want footage — they want a story. Something that makes a buyer say “I need to see this place.”
The Best Time to Shoot
Lighting separates your footage from amateur hour. My favorite time is the morning blue hour — about 20 minutes before sunrise. The sky has a cinematic blue tint, and interior lights create a warm, inviting glow against the cool exterior. It screams luxury.
Golden hour works too, but the window is narrow. If you’re shooting a large property, you might run out of light before getting all your clips.
If you must shoot midday, avoid high noon — harsh shadows on the roof and blown-out skies. Aim for mid-morning or late afternoon when the sun hits the property at a lower angle, giving it depth and texture.
Always have the sun facing the front of the house. East-facing house? Shoot in the morning. West-facing? Evening.
Camera Settings That Work
Set resolution to 4K and frame rate to 24fps (cinematic) or 30fps (smooth). Follow the 180-degree shutter rule: double your frame rate for shutter speed. Shooting 24fps? Set shutter to 1/50th.
On sunny days, that slow shutter speed overexposes everything. That’s where ND filters come in — sunglasses for your drone lens. Keep ND8, ND16, ND32, and ND64 in your bag so you can maintain 1/50th no matter the brightness.
Lock your white balance. If you leave it on auto, the color temperature shifts as you fly past trees and over pools. Pick one setting (5600K for sunny days) and leave it.
Set focus by tapping the screen after every takeoff. Plenty of pilots finish an entire shoot with blurry footage because they forgot this step.
The 5 Essential Shots
When I land, I need five specific clips to guarantee a great edit.
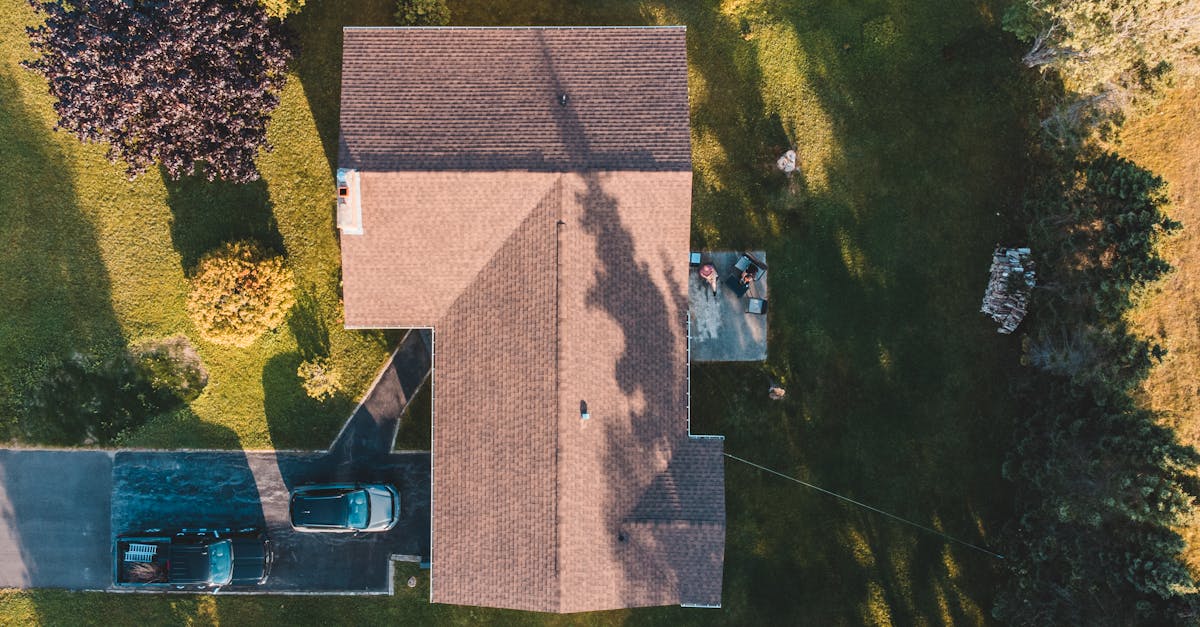
1. The Hero Reveal. Start with the camera pointing straight down at the driveway or front walkway. Slowly tilt up while pulling the drone backward and upward, revealing the entire house. This is the money shot — it builds anticipation and shows scale.
2. The Orbit. Fly to the side of the house, angle the camera slightly down, and circle the property. Use “Point of Interest” mode if your drone has it for a perfectly smooth rotation.
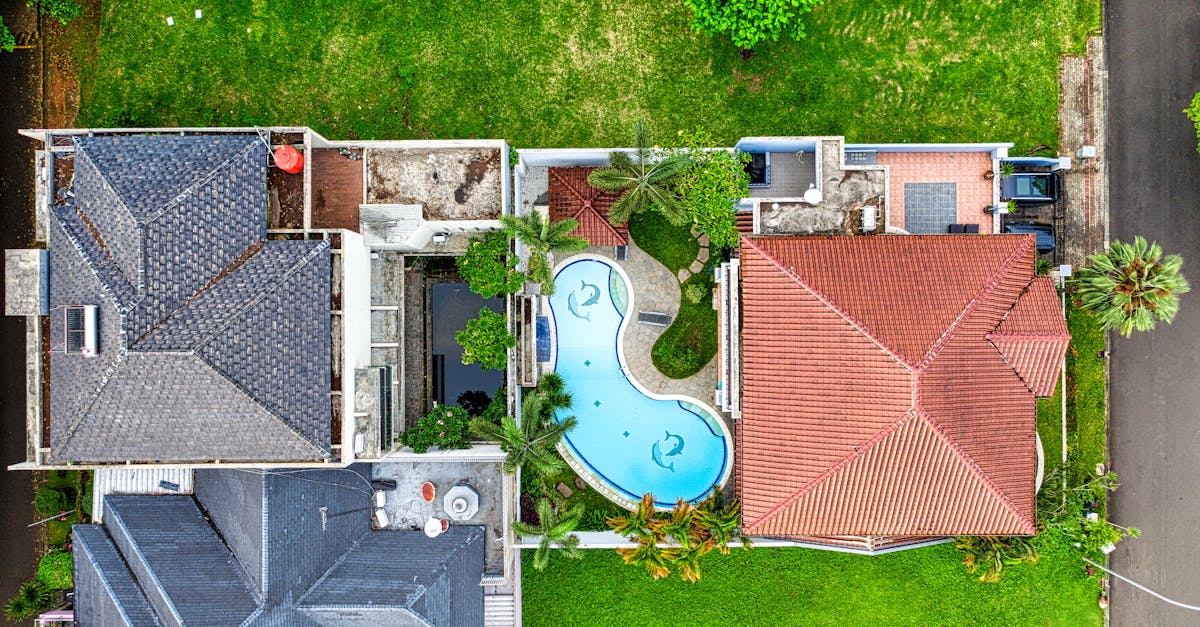
3. The Flyover. Agents love showing backyards — pools, patios, large lots. Start at the front, gain altitude, and fly straight over the roofline, transitioning from front to back.
4. The Push-In. A slow, deliberate approach toward the front door. It mimics a buyer walking up to the house for the first time. Keep it at walking pace.
5. The Neighborhood Context. Buyers don’t just buy a house — they buy a location. Pull back to show the property in relation to the neighborhood: mountains, parks, lakes, nearby amenities.
5 Amateur Mistakes to Avoid
Flying too fast. Real estate video should feel elegant. Fly at a walking pace. Rushed footage looks chaotic.
Hard rotations. Jabbing the yaw stick creates jerky camera movement. If the drone drifts, reposition slowly or redo the take.
Drone shadows on the ground. Hard to spot on your phone screen but obvious in footage. Shoot early morning or adjust your angle to avoid casting shadows on the property.
Drone reflections in windows. Position the camera slightly downward to avoid catching the drone in glass. Review test footage before the real takes.
Seeing propellers. Usually caused by aggressive stick input. Fly smooth and gentle. Wind makes this worse — if it’s gusty, reschedule.
Ask the Realtor
Before every shoot, ask the agent two questions: What features should I highlight? And what should I avoid? They know what sells this particular property. Maybe it’s the mountain view from the backyard or the custom pool. Or maybe the neighbor’s rundown fence needs to stay out of frame.
Also ask about any safety concerns — kids, pets, nearby power lines, or the neighbor who hates drones.
Pricing Your Work
Don’t charge for flight time. You’re charging for skill, gear, insurance, travel, and editing.
Aim for roughly $100/hour across the entire process. A typical real estate shoot breaks down like this: 1 hour of client communication and planning, 1 hour travel, 2 hours shooting, 3 hours editing, 1 hour delivery. That’s 8 hours — $800 at full rate.
For beginners, tiered packages work well:
- Basic ($150-200): 10-15 aerial photos + one 30-second edited clip
- Standard ($300-400): 25 photos + 60-second video
- Premium ($500+): Twilight shots + 2-minute narrated video + interior photos
One instructor reported that a property sat on the market for two years, then sold two months after adding drone video. The work sells itself when done right.
Our free Real Estate Drone Course covers every shot, camera setting, and pricing strategy you need to start booking paying clients.