Golden Hour Drone Photography: Tips and Settings
Golden hour is when drone photos go from flat to stunning. Here are the camera settings, composition tricks, and planning tips you need.
If you’ve ever scrolled through drone photography feeds, you already know that most of the best shots share one thing in common: they were taken during golden hour. There’s just something about the way low-angle light hits the ground that makes everything look better. But grabbing a great sunset shot from a drone takes more work than just launching and pointing the camera at the sun.
Understanding Golden Hour
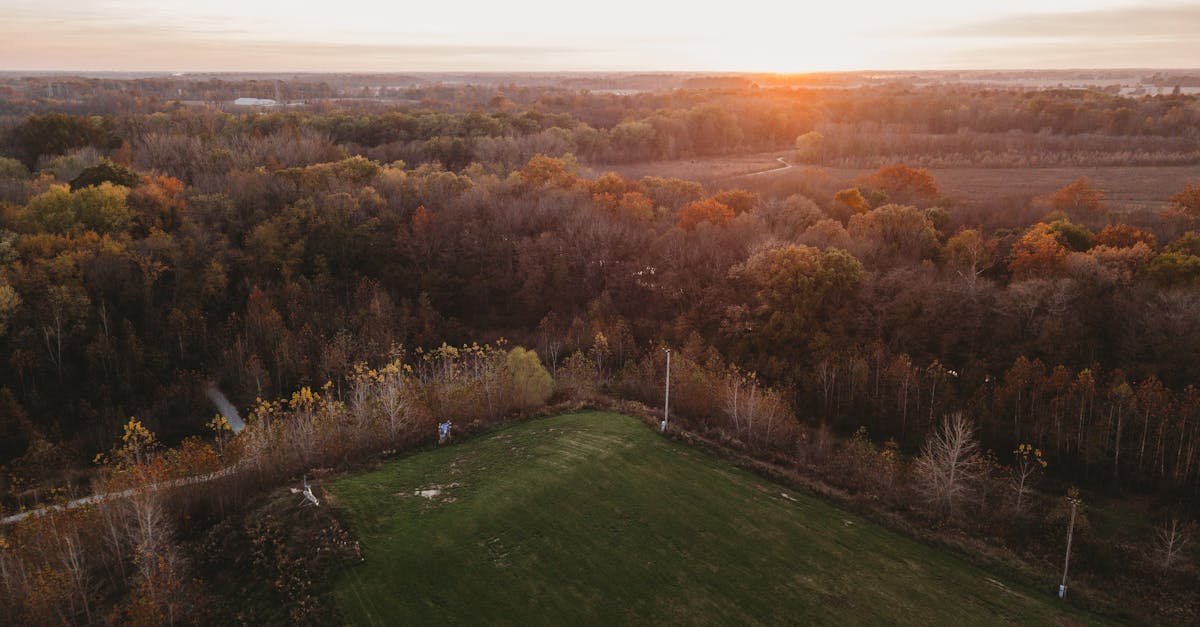
Golden hour is the first hour of sunlight after sunrise and the last hour of sunlight before sunset. During these windows, the sun sits low on the horizon. Because the light travels through more atmosphere, the harsh blue light gets filtered out, leaving warm, golden, and orange tones. You’ll also notice much longer shadows stretching across the ground.
For aerial photography, this time is unmatched. At noon, overhead light washes everything out and creates flat shadows right underneath objects. During golden hour, low-angle light skims across the ground, revealing texture in sand, rocks, and crops you simply can’t see at midday. You get warm colors, dramatic shadows that give depth, and softer contrast that’s easier for your camera sensor to handle.
Planning Your Flight
You can’t just show up at sunset and hope for the best. Golden hour moves fast, and you don’t want to waste half of it figuring out where to fly.
Use sun-tracking apps like PhotoPills or Sun Surveyor. These tools let you pick a location and see exactly where the sun will rise or set. You can figure out if the sun will be hidden behind a mountain, reflecting off a building, or shining straight down a road. Knowing this before you leave the house changes everything.
Arrive at your location at least 30 minutes before golden hour starts. This gives you time to unpack, scout, get your drone in the air, and find your framing while the light is still decent. If you wait until the light is perfect to take your drone out of the bag, you’ll miss the best part.
Camera Settings for the Best Results
Shooting into a bright sun with a small drone sensor is a recipe for blown-out highlights and noisy shadows.
Shoot RAW. JPEGs throw away too much data. You’ll need the extra dynamic range when editing.
ISO 100-200. Keep it as low as possible for clean, grain-free images.
Aperture f/2.8 to f/5.6. This keeps your image sharp across the frame without making shutter speed unmanageable.
Shutter speed 1/200 or faster. Drones hover and drift. Any slower and you’ll introduce motion blur into landscape shots.
Use AEB (Auto Exposure Bracketing). Set your drone to take 3, 5, or 7 photos at different exposures — one correct, one darker, one brighter. Merge these into an HDR image in post-production. This is the only reliable way to capture a bright sky and dark foreground without losing detail.
Composition Tips from the Air
Sun behind you — This front-lights the scene, illuminating the ground evenly and bringing out warm tones without blowing out the sky. Best for showing off landscape colors and textures.
Sun in front of you — This creates silhouettes. Trees, buildings, and mountains become dark shapes. Make sure the silhouette has an interesting, recognizable outline. A dark blob is boring, but a jagged mountain ridge tells a story.
Use shadows as leading lines. Long shadows from trees, fences, and hills pull the viewer’s eye from the edge of the frame toward your main subject.
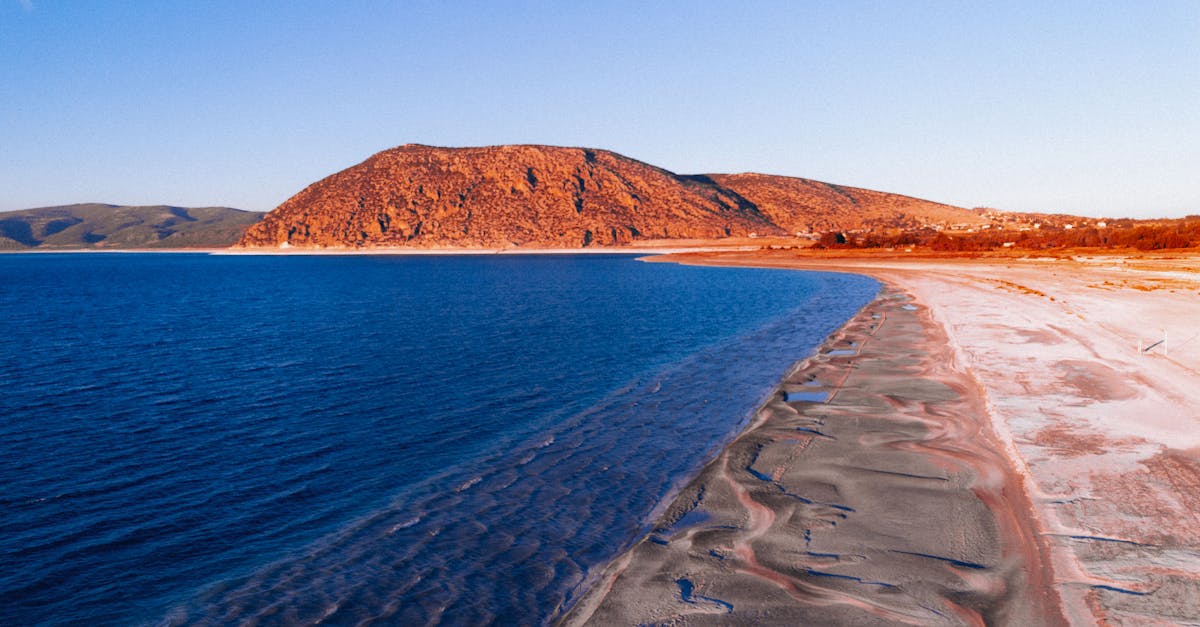
Capture reflections on water. Drop your altitude a bit. A calm lake during golden hour mirrors the warm sky, effectively doubling the color in your frame.
Don’t Forget the Blue Hour
A lot of pilots pack up the second the sun dips below the horizon. That’s a mistake.
Blue hour happens roughly 20-30 minutes after sunset (or before sunrise). The sky takes on a deep, rich blue while the horizon holds a lingering warm glow. This contrast between cool blue sky and warm ground lights is incredibly striking — especially for cityscapes, where streetlights and building windows pop against the dark blue background. Your drone sensor actually finds this light much easier to balance than the harsh sun of golden hour.
Common Mistakes to Avoid
Leaving white balance on auto. As the sun moves, auto white balance constantly shifts colors, making it a nightmare to edit a consistent batch. Set white balance to “Cloudy” or “Shade” for locked-in warm tones. This tells the camera to stop trying to neutralize the golden colors.
Overexposing the sun. A small drone sensor can’t handle a sun in the center of the frame. The sky becomes a white blob. Keep the sun near the edge, or partially hide it behind a tree or building. This reduces glare and creates a nice starburst effect.
Not bracketing. If you’re not using AEB, you’re forcing your camera to choose between a bright sky or a dark ground. Bracketing fixes this completely.
Our free Drone Photography Masterclass covers lighting, composition, and editing for stunning aerial photos.